Friday, October 21, 2016

Sewing Room Makeover!

I have a new sewing room!!! Well, it's the same room, but recently had a transformation to turn it into a much nicer, more inspiring place to be!


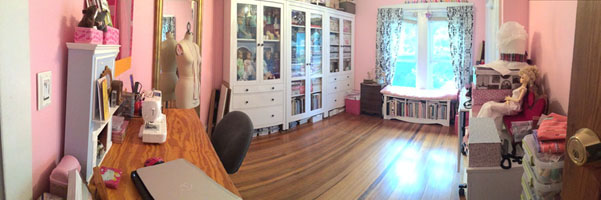
For years, I've been living with chaos. Seriously, total chaos!


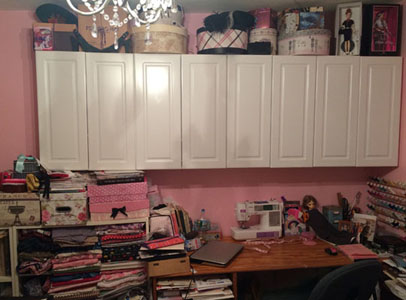
Along the largest (well, in that it isn't broken up by windows/doors) wall of the room, I had put up overhead cabinets a few years back. At the time, this seemed brilliant to me, because that way I wouldn't give up floor space. But seriously, what did I want with that floor space against the wall? I ended up struggling to find little bookcases to stick in there to hold my fabrics and notions.

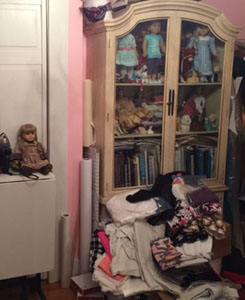
On the opposite wall of the room, the vintage hutch that I bought because at the time I thought it was so pretty was busy being almost useless. The shape of it limited how many dolls could stand in it, the shelves were not adjustable, and the cabinets underneath were not a good size/shape for storing much of anything. Also, because I had too much fabric and not enough logical storage for it, things tended to heap up in front of the useless hutch cabinets!


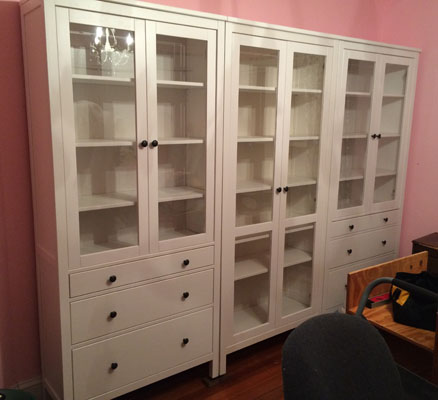
I found that whenever I was in the room, I felt annoyed and uninspired. It had to change! I spent a ridiculously long time planning what I wanted, and trying to find the thing that I dreamed up. I knew I wanted white furniture, and I was hoping for floor to ceiling cabinets with glass fronts. How lucky was I that Ikea's Hemnes series is exactly what I was dreaming of?!? Even though it was perfect, I still agonized for a few more months before making the purchase, because it seemed so expensive, and what if I didn't like it in the end?!? I finally took the plunge and purchased the pieces.

The whole process of going from "old sewing room" to "new sewing room" was a bit insane. The rooms in my house are not huge, and there is not a lot of space to stick things, even temporarily. It was like a circus act, boxing things and moving them here and there to make room to take this down, build that, move those, etc. (Not to mention, in the midst of this, I was trying to find new homes for a lot of things, so I'd get these emails from people willing to take this or that, and then I'd have to go nuts figuring out where I'd shuffled whatever it was to! Total madness!) It started with clearing one half of my sewing room (which sounds so simple, but honestly, I thought I wasn't going to make it, ha ha ha!) and taking down the overhead cabinets. . .

Woody helping Glenn take down cabinets
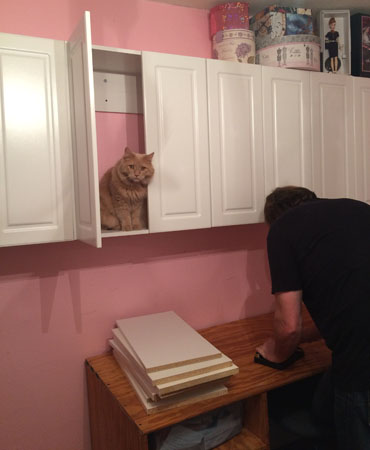
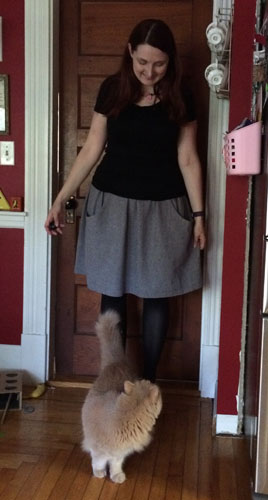
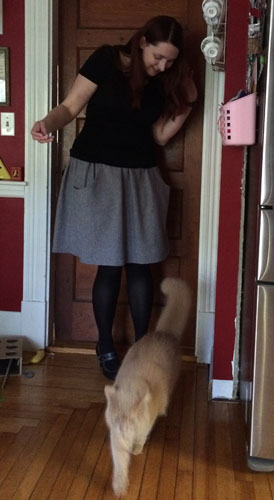
Cat helpers are almost as good as husband helpers! ;)

Then, with a newly open space to put my new cabinets in, I was ready to start assembling. Thank goodness my husband was helping, because these pieces were large and needed some strength to make sure everything was in tightly. For example, we learned that I am not strong enough to set the screws in the drawers all the way in, and that if they aren't all the way, the drawer won't close! But at least, we achieved success!

Newly installed cabinetry

Then, it became time for me to start putting everything to rights in their new spaces. I was really determined to downsize things, so instead of rushing to stuff everything into a spot, I slowly went through things, one box at a time, only putting back the things I knew I still really wanted and would use. The cats loved this entire process. There was always some new box or bin that was the latest greatest nap spot!

Cats enjoying the chaos

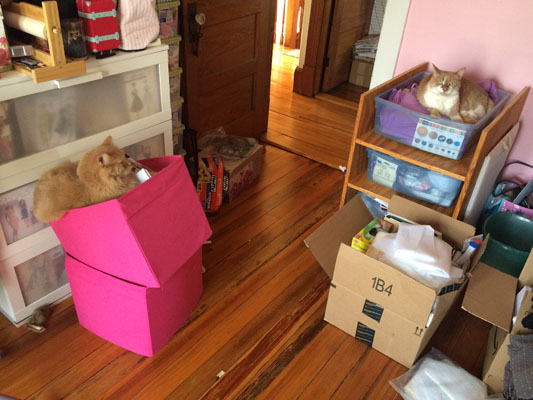
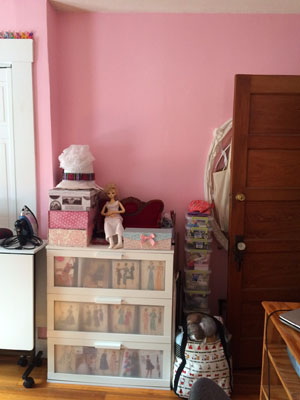
One of the things I was most stressed out about when deciding to go for this makeover was that I was going to have to cut down my sewing table. My husband made me this sewing table a really long time ago, when we were living in our tiny, rented cottage, and I was sewing on the dining room table, and all my patterns fit in a plastic bin that rolled under the counter. (Can you imagine?!? I won't even admit to how many patterns I own now!) I had gone to Costume College, and while I was away, he surprised me by rearranging the bedroom so that I would have a nook to sew in, and made this table to perfectly fit the space. So naturally, I'm very sentimental about it! He kept trying to persuade me to get rid of it and get a desk that matched the rest of my fancy new room, but I just couldn't do it. It wouldn't fit against the smaller wall without first losing a few inches off it, so Glenn disassembled it, cut it down, and put it back together. (In the previous picture, Taffy is actually sitting in the top "drawer" of my sewing table, because the table top was in the basement being cut when I took that picture!)

In the end, it was all worth it! My new space is beautiful, peaceful, and inspiring. I'm so motivated to make all the things in it! And cutting down the table turned out to be a happy thing because, prior to cutting down, it used to jump a little when I ran the sewing machine on the fastest setting. Post-cutting down? Not even a tiny jump! Hooray for that!

Here are some additional pictures of my "new" sewing room. . .


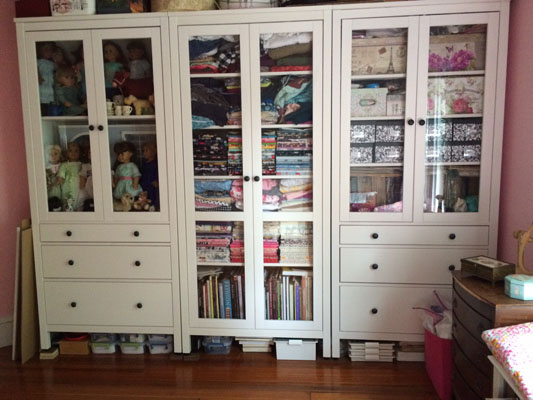
My new cabinets! All the dolls fit, because this cabinet doesn't have a curved top, and I can control the shelf locations. The drawers in that unit hold doll clothes and accessories, with some overflow under the cabinets. The middle unit has my best costuming books, and all kinds of fabric! I am slowly working on neatly ironing and folding all the fabrics. You can see which shelves I've finished and which I have yet to get around to doing! And finally, the unit at the right has all my notions, most of my works in progress, dollmaking supplies, antique fashion magazines, and assorted other odds and ends that make me happy.


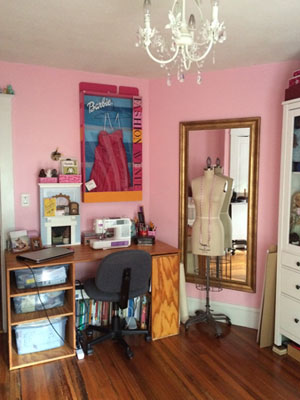
My shortened sewing table fits perfectly on the smaller wall now! I don't miss the extra length, as I feared I might. In fact, I tend to not let things pile up on it any more, since I haven't the extra space, so that's a good thing! (Don't mind my overflow of books! Buy all the costuming/craft books, right?!? Also, there's that hole in the wall which needs patching, that is the result of a rewiring project that involved getting rid of super old wires in favor of wires that won't burst into flame, which is a good thing!)


What have we here? Empty wall space!!!!! I can not tell you how excited I am to hang things up here. I have acquired quite a hoard of wonderful, inspiring things that have been needing a place to hang. My only problem now is making a choice as to which things get to go up! I'm trying to figure out how I can make it so I can switch things out now and then, and hopefully get to enjoy them all!


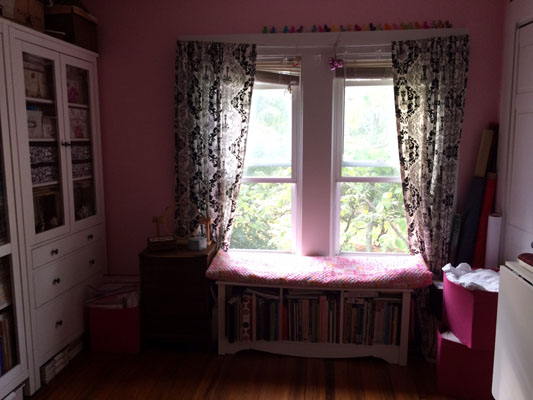
My lovely windows! I have some issues to address with that curtain rod and shade situation, but it's fine for now. That bench is a beloved spot for my cats, and I also often enjoy doing some hand sewing there, with a cup of tea on the little table beside.

What was once a stressful place of chaos is now a peaceful, pretty place for me to enjoy. It was so satisfying to downsize and clear out things I'd been hanging on to but knew in my heart I'd never use, and everything having a designated place has made it a piece of cake to keep things clean and organized. I still have a little more downsizing to do (patterns, doll things, fabric, and maybe even some of my beloved books), but on the whole, I'm feeling very good about this. Every time I walk into this room, I feel my mood lift, and I feel inspired to make all the things!

Wednesday, October 19, 2016

More Skirts!

The third and final skirt I've been meaning to post about is this simple cotton number I made up using Simplicity #2226. This is one of their "learn to sew" patterns, and I felt a little ridiculous buying it since I've been sewing for more than two decades! But I thought the style was cute, and I'm a sucker for good-size pockets, so I had to have it.

Simplicity 2226 skirt from Craftsy kit

Can you even see the pockets, though?!? I took the time to really match things up! In this side view, the skirt is rippling more than the pocket, but trust me, it all lines up. I'm obsessive about these sorts of things. ;)

Simplicity 2226 skirt from Craftsy kit

The fabric came from a Craftsy kit that I impulsively bought during one of their sales. This is not the sort of print I would normally choose, but I was trying to step outside my comfort zone a bit. I don't think I'd recommend purchasing the sewing kits from Craftsy. I've bought a few of them now, and they barely have enough fabric to make a garment. There is definitely no allowance for matching prints or making even small alterations for size. In this case, there was no fabric allowed for the tie belt that is included in the pattern, which was sad. I ended up hunting down an additional yard of this same fabric, so I may make the belt, as well as a new waistband, because since making this, I've lost so much weight that it is actually a bit too loose!

Simplicity 2226 skirt from Craftsy kit

Of course, I had to make the insides very beautiful, as I always like to do! In this case, I fully lined it, as well as used my beloved Hug Snug seam tape on the exposed seams. I think it's worth it to take the time to make things nice inside because it makes it hang nicely, keeps things from unraveling, and just plain makes me happy!

Simplicity 2226 skirt from Craftsy kit

In looking through these pictures, I realized I never added the hook and eye at the top of the zipper. Oops! I'll have to go back and add that. . . But here's the back view, anyhow. . .

Simplicity 2226 skirt from Craftsy kit

I used to wear the shirt untucked with this skirt, but now it's really too loose, and I need that extra fabric tucked it to help it stay up! But here are some pictures of it untucked, all the same. . .

Simplicity 2226 skirt from Craftsy kit

This cat is Ginger. She has a bit of a Jekyll/Hyde personality. When she's Jekyll, she's so sweet and huggable, but when she's Hyde, best to only pet with your eyes, and not your hands, if you value having them in one piece. ;)

Simplicity 2226 skirt from Craftsy kit

Pockets!!! Love. Also love this necklace, which is the silhouette of Jane Austen, and was made by my talented friend Taylor, of Dames a la Mode fame. It filled a gap in my jewelry collection. (Yes, I had a wardrobe gap due to "not owning a necklace with a literal Jane Austen theme so that the world can know how much of a Janeite I am!") It was impossible to photograph, but I didn't want to not mention it as I am so very much in love with it!

Jane Austen necklace by Dames a la Mode

And finally, as a bonus, here is a second skirt I made from this pattern. . .

Simplicity 2226 skirt with science theme

I made this one for my niece, who is studying to be a chemist, and has appreciation for a fun, crazy skirt such as this! This one was even tricker to match up those pockets, as I was dealing with a very small amount of fabric, but I somehow pulled it off. And of course, once again, I fully lined it, and also finished the seams with Hug Snug seam binding.

Simplicity 2226 skirt with science theme

I've been promised pictures of the skirt in action in the lab, so I'll definitely post those when I get them!

Tuesday, October 18, 2016

Brumby Skirt

Skirt #2 that I want to post about is Brumby. I tried to take marvelous pictures of this and another skirt, but it seems I am always at work, or at school, or it's cloudy or raining, or whatever other fiasco turns up. I made it outside today to try some nice fall foliage pictures but of course, no matter where I went in my yard, they all turned out too dark. So, you get poorly lit kitchen pictures, complete with piles of cat toys and even some cats! This particular cat is Woody. He is a bit mischievous, but also a total cuddle muffin, so he gets away with all the mischief. ;)

I fell in love with the Brumby skirt long before the pattern was ever published. Megan Nielson published some pictures of her skirt in denim and I thought, that skirt is perfect!!! What felt like ages later, the pattern finally got published, and I immediately purchased it. For my first attempt, I made it in a medium weight chambray. I want to say it was a Robert Kaufman linen blend, but I'm not completely sure on that. Most of the time, I order my fabrics online, so I can usually look up what a fabric was. . . But this one, I actually bought in person, in a little shop in Portsmouth, NH.

Megan Nielson Brumby skirt in chambray

When I first tried this on, I tried it on with all kinds of tops, tucked and untucked, and universally decided "NOPE! Not on my body!" My finished Brumby then languished for a while, unworn and unloved. Then one day, I tried it on again, and I don't know what happened but I decided I really liked it. It has since become one of my most comfortable, most often worn items of clothing! I guess it just needed to age for a bit. Here is what it looks like with the top tucked in, although this is rarely the way I wear it in real life. . .

Megan Nielson Brumby skirt in chambray

I opted to put a ton of fullness into the back of the skirt. I really wanted it to be swishy and fun, and it definitely is!

Megan Nielson Brumby skirt in chambray

The other feature I really love about this skirt are the pockets, which are so roomy that one can fit all manner of things in there! Part of my commute for work involves a train and then a shuttle bus, and in the process of that commuting, these pockets saw knitting projects, an iPod, my T pass - even a bottle of Coca Cola! They really are wonderful pockets.

The only changes I made to this pattern were to adjust the length, and I skipped the exposed zipper and went with an invisible one, instead. I just can't seem to get on board with this exposed zipper trend. I guess I'm old-fashioned! I also don't want to suddenly have all my hand made things be obviously outdated when this trend finally passes by, as all trends eventually do! At any rate. . . Everything lined up in back so perfectly that I really think the sewing fates were smiling down on this project!

Megan Nielson Brumby skirt in chambray

Normally, I line almost everything. I skipped lining this skirt, figuring it would be a summer skirt and I'd be wearing it with bare legs, but then I ended up wearing it all through the cold months, with sweater tights, which meant I had to wear a slip. I really regretted not lining it, and will not make that mistake again! I did, however, take the time to finish all the exposed seams with a Hong Kong seam finish, using some lovely blue Hug Snug seam binding. This is my absolute favorite way to finish raw edges. It's not only neat, but it can be a fun way to add a secret pop of color!

Megan Nielson Brumby skirt in chambray

I absolutely love this skirt! I have another cut out in denim that I can't wait to sew up!

Megan Nielson Brumby skirt in chambray

Monday, October 17, 2016

Swan Lake

I have so many lovely things I want to blog about, that it's actually kind of crazy. I've been having some fun crafty adventures, including finally getting back to making historic costumes, in between all the school madness that is ongoing. But first, I want to post about a few skirts I made over the past. . . Wow, I guess it's been almost a year for at least one of these!

I'll start with a whimsical skirt I made to go see the Boston Ballet perform Swan Lake this past spring. I had this fabulous Michael Miller Swan Lake themed border print in my stash, and thought it would be fun to make a skirt from it for this outing. I just wanted a simple, box-pleated skirt, so I didn't bother using a pattern. Although I'm very happy with my pleating and the look of the skirt when laid flat, once it was on my body, I felt huuuuuuuge! I was at my heaviest and feeling very bad about my body, but I was also sick of "saving" my nice fabric and not making anything for me because of feeling bad about my weight. I knew this skirt would look ridiculous on me because I'm already short-waisted, but when I'm carrying extra weight, it's even worse. And also, I don't like my skirts too short, so between the waist placement and the length needed for me to be comfortable, the skirt came out looking proportionally ridiculous - as I knew it would! I'm glad I went for it though, because I had fun wearing the skirt, and got a lot of complements. (And side note: I've since joined Weight Watchers and have been steadily losing weight while gaining energy and a healthier lifestyle! I'm feeling quite good about myself now, and looking forward to reworking this skirt to suit my new body!)


The ballet itself was positively sublime! I love going to the ballet in general, because it's like a vacation from life for a couple of hours. You just get totally swept up in something that is nothing but beautiful for both the eyes and ears, and for those couple of hours, I don't think about all the things I have to do, or how ridiculous my job is, or how stressed out about school I am. . . I just enjoy being part of a totally magical, fantastical moment. Swan Lake is my favorite because I am completely in love with the music, and the costumes for this ballet were perfection.


The pin I'm wearing is from "Deer Arrow," a company with a terrible choice of name (don't google images to see their pins unless you don't care about seeing how cruel people can be to animals), but beautiful pins. I thought it was the perfect accessory for my ensemble!


The Boston Opera House is stunning. We got there a little early, allowing us time to wander around and be in total awe of the beauty of the place, to admire all the quirky little corners, and marvel at the beautiful fireplaces and other architectural details.


The ballet itself was absolute perfection. I was replaying it my head and humming it for days! I don't often go to see a ballet, but every time I do, I remember how much I love it, and that I should do it more often!

As an added bonus, we ran into the new-ish Poe statue! I'd been wanting to see it, and I'm especially happy we saw it at night, because it looked appropriately gothic!