Monday, November 17, 2014

King Richard's Faire 2014

I did indeed manage to squeeze in a visit to King Richard's Faire, just in time, during closing weekend. (I can't believe that was already a month ago!) The good news is, it was wonderfully warm. The other good news is, I got to make use of my new shift and accessories I'd been working on!

Finished 16c Faire ensemble

Finished 1560s - 1570s ensemble

I had been planning to just go on my own, but my husband was kind enough to offer to go with me, and I think even he ended up having a good time! We did archery, watched a few shows, and of course, had to see the joust. We selected where to sit at random, and ended up with a Scottish knight! This is so appropriate since I am Scottish, and had I been seated elsewhere, I'd probably have been cheering this knight anyhow. ;)

Scottish knight at King Richard's Faire in Carver

I was impressed that he was wearing a kilt with this armor!

Scottish knight wearing kilt at joust

That would have been the highlight of this year's Faire for me, but then. . . I met King Richard himself! SO AWESOME!!!

Jenni and King Richard at King Richard's Faire in Carver MA

So it was a perfect year at the Faire, and I can't wait for next year!

Friday, October 17, 2014

One more accessory for Faire this year. . .

I finished one more accessory for my trip to King Richard's Faire this year. . . Though to be honest, while it's plausibly historically accurate, it's not the correct period for the rest of my faire garb! This pouch is medieval, while the rest of my ensemble is meant to be c. 1560s-70s. What can I say? When I saw a historic purse that involved cats, I could not resist. And I'm quite certain there will not be anyone at the faire secretly snarking about my mis-matched eras since I fully anticipate being surrounded by people in costumes spanning medieval through Victorian, plus modern day, and things that never existed at all! ;)

Finished medieval kitty bag

And then just one more shot, with the ties not drawn up. . .

Finished medieval kitty purse

This was such a quick, fun little project! Mine is quite small, as I used fingering weight yarn and size 1 1/2 needles, but just by altering your yarn/needle sizes, you can make this in all kinds of sizes. As it is, mine turned out so that it fits my phone and money perfectly, and really, what else do you need at Faire (assuming your phone is also your camera)? ;)

For more details (and a link to the pattern/charts), feel free to check out my Ravelry page for this project.

Tuesday, September 23, 2014

16th Century Smock

Next up on my list of enhancements to my 16th century ensemble was an upgraded "smock." My previous smock was made in cotton, and partially machined to save time. I'd be longing for something a little more accurate, so this time around, I used handkerchief linen, and hand sewed it. I Frankenpatterned, using Kannik's Korner's 18th century shift to get basic proportions, as I already know and love that pattern. Then, I referenced The Tudor Tailor to see what I'd need to change to make it accurate for the 16th century.

16th Century Smock

I went with just a basic scooped neck because it's what suited the rest of my ensemble, but instead of just turning the raw edge under, I made a self-fabric bias binding to act as a casing. I did this because I made the mistake of buying cheap linen, and it frayed worse than any fabric - linen or otherwise - I have ever worked with! I would have preferred the turned-under edge finish, but the casing method worked out all right too. For the cuffs, I knew I wanted ties at the wrists. Tudor Tailor shows just one set of ties per cuff, but I went with two because I had this lovely narrow tape and I thought it would look delicate and pretty to have two sets of ties.

16th Century Smock, detail of cuff

So, with this new smock, I'm technically ready for the Faire! However, there's always room for more accessories. . . ;)

Thursday, August 14, 2014

16th Century Accessories

I've been working lately on a few enhancements for my c. 1560s-70s ensemble, with the hopes of making it to King Richard's Faire this year. First up, I finished a partlet:

Partlet frontPartlet sidePartlet back

I made this using two layers of handkerchief linen from fabrics-store.com (off-white color but I can't remember which of their "white" shades this is - both their optic and bleached white are more of a winter white, FYI), and the pattern is from The Tudor Tailor. I hand-sewed it just as the book describes, but when finished, I felt an urge to make tiny, perfect top-stitches around all the edges. . . So I did just that, and I think it made a difference because it seemed less flimsy and "slippery" after that.

Even though the collar is capable of standing somewhat on its own (even pre-starching!), I'm currently thinking of wearing it folded down, like this:

Partlet front

I also bought some cheap cotton shoes that are not period correct by any means, but are a bit better than the Sketchers I wore last time! At least these are just a plain woven cotton, dark in color, and should not stick out.

Shoes

I'm working on a few more items to step up my 16th century game, but what I complete will all depend on when I end up going to the Faire!

Wednesday, May 21, 2014

Treat Yo' Self!

A couple of weeks ago, I had an heartbreaking disappointment which left me feeling pretty down in the dumps. I did all the things that generally cheer me up (ironed a bunch of fabric, organized the sewing room, and made more double-fold bias tape than you can shake a stick at), but ultimately decided that I deserved to treat myself to something special and frivolous. I decided I would at last purchase the Wooded Hamlet crinoline kit! It's the perfect frivolous choice for me since it's pricier than I would regularly spend on an underpinning, and I have already made at least three crinolines for myself rendering it not really necessary!

Once I'd decided I would make that fabulous crinoline, I clearly needed a whole new underpinning set to go with it! So, one thing led to another, and I ended up ordering a ton of white fabric, plus some other fabric and random supplies for upcoming projects.

Then, over the weekend, we went to Brimfield, and this happened:


This Brimfield trip was one of the best yet, aside from it being terribly muddy! I got the best deals (such as 1930s dress patterns and 1950s hat patterns at $1-$2 a piece!) and found way more than I usually do (as the picture proves!) I'm probably most excited about that c. 1880s bonnet, which is stunning and absolutely covered with amazing beadwork, and which my husband negotiated down to $25. Amazing! I am most definitely going to be making a repro of that at some point in the future!

So, it's been a somewhat pricey couple of weeks, but well worth it because I officially feel back in the saddle again! Also, I won't need to order anything at all for the foreseeable future. Tom & Donna would be proud, I think. ;)

Sunday, May 4, 2014

A New Bonnet, and Fort Fred Adventures!


Last weekend, I travelled to Gloria's place and had a fabulous pair of days seeing the sights in DC, and then attending the Fort Fred marketplace on Saturday. I refashioned an old dress to temporarily fit my not-my-usual-size-self by making a quick stomacher and pinning it in, but more importantly, I finished this fabulous, huge, new bonnet to wear with it!


It was so much fun getting to shop in person from all these places I usually only get to see online!


After all kinds of shopping, I came away with a pair of silk stockings and this neckerchief, which Gloria kindly held up for a picture:


I took a lot of pictures over the course of the weekend, and had lots of pictures taken of me, but this one is by far my favorite, for how very silly it is!


To see more pictures of the adventures and the costumes of all my fabulous friends, please check out the Fort Fred 2014 page on my web site.

Such a great weekend! So many thanks to Gloria for hosting me, and to Taylor and Stephanie for the pictures of me! Hopefully I can make it down for more of the DC area events in the future!

Wednesday, April 23, 2014

17c Hat Progress. . .

My shellac finally arrived yesterday, and as I was working from home and knew it would arrive that day, I started my work day quite early so that I could do the first coat at lunch break, the second immediately after work, and then additional coats throughout the evening as needed. But first, it had to come off the block!


Next, I moved the adventure outdoors and gave the hat its first coat of shellac:


I did so many coats! My last one, it was almost totally dark out! I was using a pre-mixed shellac/denatured alcohol that came in a spray bottle, ready to go. I won't go this route again because even with so many generous coats, it still is too floppy, and worse, it caused white blotches which you'll see in some of the pictures below. So, for the next time, I'm going to go with the more traditional brush-on type! And for this hat. . . Well, I'm out of time until I get back from Virginia on Sunday! But post-Fort Fred, I'll try to remove those blotches, and then try out the brush-on mixture on this hat (before I move on to my really nice quality black capeline!)

But, pretending I'm done with stiffening, and having trimmed the edges to be nice and smooth, added a hat band and some temporary trimmings, here is my hat:


And, the best I could do to get a picture of it on since nobody else is here and I'm not good at selfies:


So far. . . I love it! I think I might cut back the brim a bit more, but I'm going to wait until I've finished stiffening to make a final judgement call on that. Also, clearly that's not a period-correct ensemble for this hat! Another post-Fort-Fred-trip project. ;)

In other news, I had so much fun with making this that I forsee the possibility of becoming a bit of a felt hat making addict! I'm already coming up with ideas of all kinds of hats for various eras. . . Although, the trick will be coming up with appropriate hat blocks!

Sunday, April 20, 2014

Adventures in hat blocks & blocking. . .

I was recently asked if I had ever tried blocking felt hats, and my answer was no, that I'd only worked with shaping straw hats. So, I decided to block a felt hat! I placed an order with a millinery supply shop for a lovely quality black wool felt capeline (and some shellac) but just had a funny feeling it was going to take a while to get to me. As I was very anxious to get going on this project, I bought a couple of cheap hat blanks on eBay. This turned out to be a good decision because I'm still waiting for the millinery supply hat, but the eBay hats arrived on Saturday!

So, I had hat blanks, but the one critical thing that I was missing was a hat block. I searched everywhere I could think of online, but all I could find were the usual oval/head-shaped blocks. What I was after was a round block, with a sort of tapered cylinder shape. I simply could not find what I had in mind, but one can not very well shape a hat without something to shape it on! So I thought perhaps if I had a fabric with no give and a firm weave, I could make it of fabric and stuff it somehow. As it turns out, I have this ridiculous plaid fabric that I've been hanging on to even though I thought it really had no purpose since it was almost like plastic, it was that stiff and non-stretchy! Even on the bias, this fabric pretty much doesn't budge! So, yesterday, I patterned it and sewed it up. . .


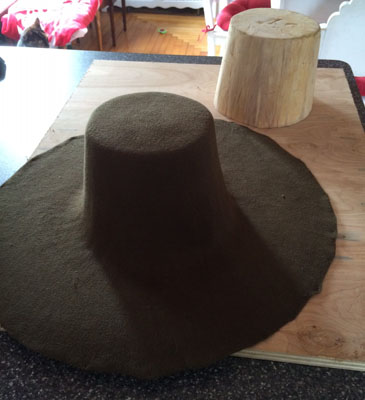
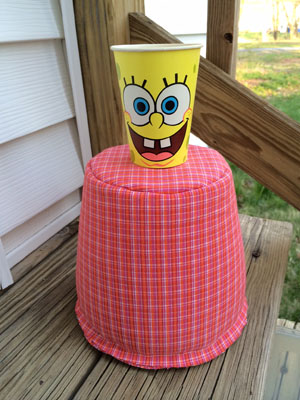
I left the seams on the bottom outside intentionally so that it would be a bit easier to sew the opening once the form was stuffed! And, that brings me to the next problem: What to stuff it with? I thought perhaps sawdust, since that is what I use for making the bodies for my reproduction French fashion dolls, but I didn't have enough on hand to fill it. So, I decided to try sand, since it's really cheap and can be bought at any Home Depot or Lowe's. Here is the finished item (and my highly sophisticated sand scoop!) ;)


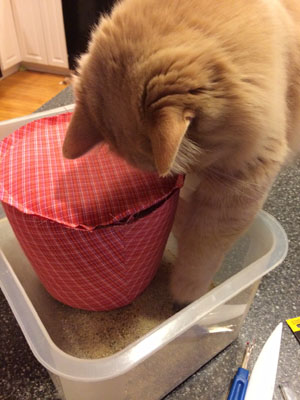
I felt like I might have over-stuffed it a bit, so I ended up removing a bit of it. Woody was very helpful with this. . . Or, maybe he thought this was some funky new form of a litter box!


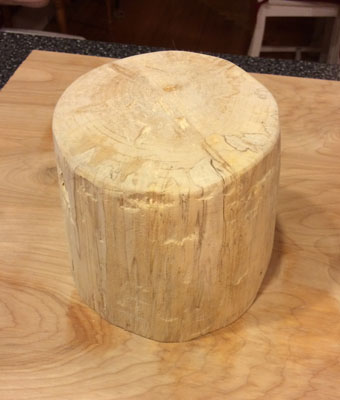
I think this option could theoretically have worked, but even though the fabric did not stretch, and the sand was VERY tightly packed (I used a mallet and pounded it into the most compact pile of sand I could manage), the entire thing still seemed to shift a bit from side to side if given a decent nudge. After all, this is sand we are talking about! I think it would have been a giant headache to be worried about checking that it was still upright and level the whole time I was also trying to shape the hat! So it's a good thing I have such an awesome husband who was willing to try to turn a log from the wood pile into a wood hat block!


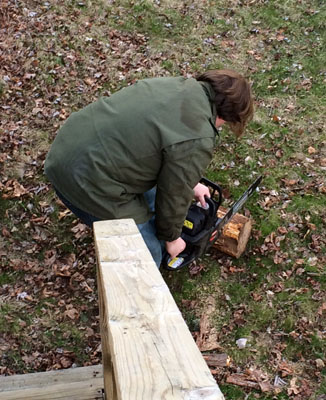
We don't have a lathe, so Glenn was limited to chisels and his sander. I think it actually turned out quite well! (It actually tapers a bit more in "real life" than it appears to in the picture. Not sure why it would not photograph the way I was seeing it!) I felt like I could totally use this for my felt hat making experimentation.


Funny story: We had this long conversation on Saturday morning about how it would be so great to know someone who did woodworking, or who at least had a lathe, but alas, we didn't have the proper connection. Meanwhile, little did we know, Glenn's brother was not even thirty minutes away, messing around with his newly-purchased lathe! Found that out this morning at Easter brunch. Things I wish I knew yesterday!!! Ha ha ha!

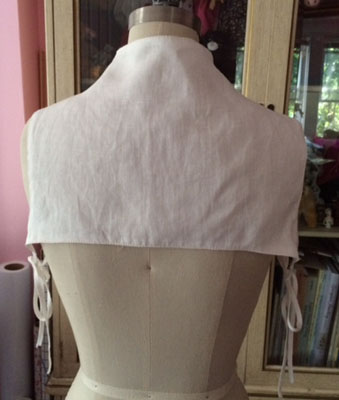
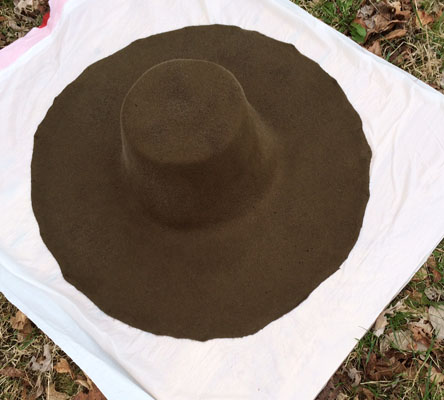
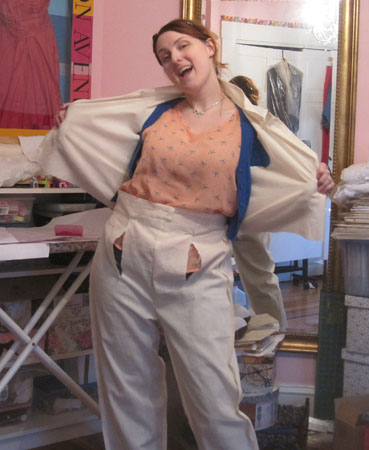
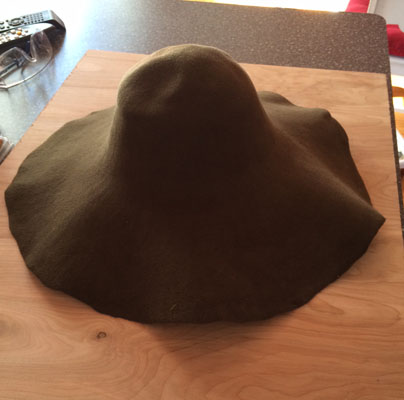
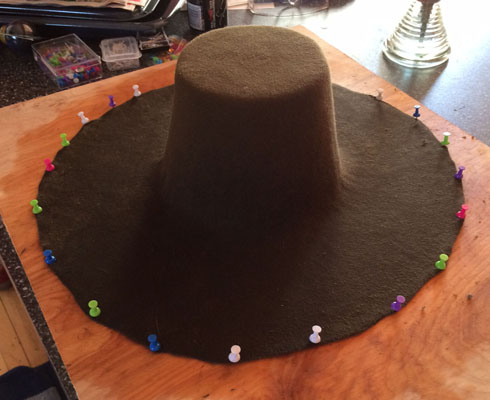
This morning, I got up early so I would have time to block my hat before heading out to Easter brunch at the in-laws' house. Here is the "before" shot of the capeline:


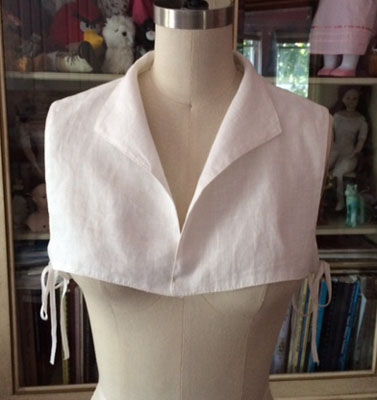
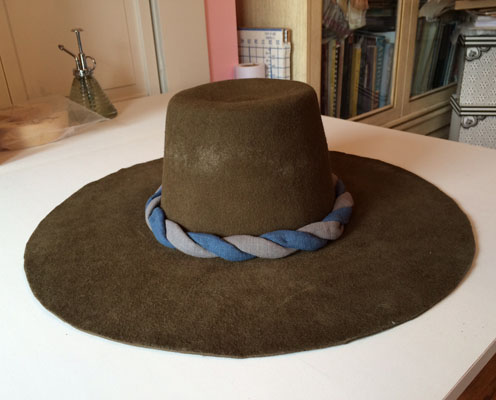
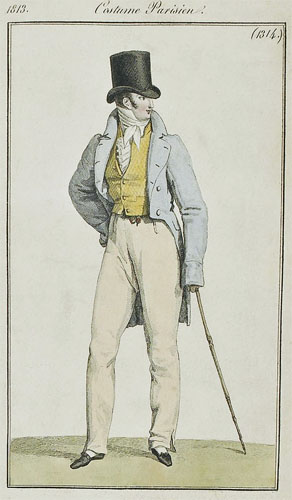
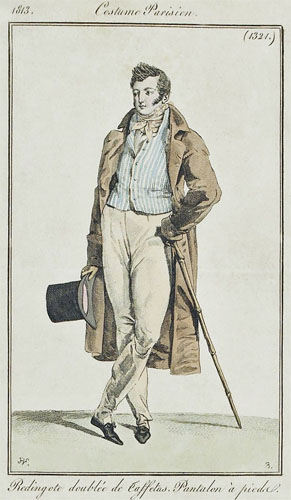
I got it really damp and pliable using a combination of my steamer and a plant mister, molded it over Glenn's block, and used push pins to hold the brim out the way I wanted it. I was aiming for something along the lines of some extant 17th century hats in the Victoria & Albert Museum, (T.22-1938 and T.23&A-1938). I think it turned out pretty well! Mine might not taper quite as much as my inspirations, but after all, this was about challenging myself to shape a felt hat, not create a hat block, right? So I'm calling this a success! ;)


So now, I'm letting it dry, and also waiting for my shellac to arrive in the mail. Then I'll give it a couple of coats of that, then trim it, and it will be ready to wear!

Monday, April 14, 2014

Regency Intensive Dance Weekend, and the start of a new dress. . .

I've just returned home from the CVD Regency Intensive Dance Weekend, and thought I would promptly post my few pictures. Why so few? Because we were dancing almost non-stop! There were five hours of classes on Saturday, followed by a soiree in the evening. The pictures below are from that soiree. . .


Glenn looking thoughtful and dapper:


And myself looking perhaps a little tired and overwhelmed (as indeed I was):


Guys, they mean it when they call this weekend "intense." Indeed, for someone who has almost zero dancing experience, and especially someone like me who is better off learning things a small chunk at a time as opposed to ALL THE THINGS at once in one half of a day, it really is quite grueling and overwhelming. That said, the CVD people are AWESOME. They are so friendly and welcoming, and patiently guided us through each dance we messed up (which was almost all of them, unfortunately!) I did learn the basic steps so that theoretically, I can dance a dance if someone just tells me what the "moves" are and queues me as to when I'm supposed to do them vs. wait for the head couples to move to a certain point. . . But if nobody is prompting me? I get lost. Also, when they taught the basic travelling step at the start of the weekend, I apparently did it completely wrong, and didn't know that until several dances in, when another dancer kindly caught me aside on a water break and very patiently helped me re-learn it. But, since I'd missed the chance to repeatedly practice it (correctly, anyhow), it's like I couldn't get it into my muscle memory because I was so busy trying to memorize everything else. Anyhow. Really long story short is that it was a lot to absorb in a condensed amount of time, and I felt so bad about messing up all their dances, especially since we seemed to be the only ones who weren't pros! So, we decided that instead of doing the second day, we'd go off and have a tourist day in the north shore. Hence, no pictures of the grand ball. Instead, we took a little driving tour of the area had some delicious ice cream by the sea in Gloucester, and finished up the day by taking in a movie. Very relaxing, which is just what we needed after the non-stop pace of the day before!

I'd started a second ball gown (since there would be two evening events, and I thought it would be more fun to have a different dance for each!) but to be honest, by the time the classes ended, I already suspected I wouldn't be attending day two, so I didn't make an attempt to swiftly finish the second dress, and instead just wore my fancier ball gown to the soiree. Here's a sneak peek of the second ball gown that is not quite finished yet:


I really love this fabric, which is a wonderfully lightweight cotton with self-stripes as well as a thin silver metallic stripe running through it here and there (and cost me only $2.50/yard!) I finished all the seams as I went along, so I really do just need to add the skirt (panels are already seamed and ready to go), sleeve bands, and a hem. Exciting! But, I'm going to set this aside for a few weeks while I put finishing touches on my 18th century attire since there are now less than two weeks to my next costuming adventure: Fort Fred! Hooray for an exciting April full of sewing/costuming adventures!

Sunday, March 23, 2014

It's a little silly in my sewing room right now. . .

Well, the long story short is that I used old measurements for Glenn and the mock ups I assembled today were not a good fit. It looked so ridiculous - especially since the shirt has no sleeves yet - and I can't recall when we last laughed so hard! So I'm not sharing pictures of that with you, but I did go ahead and have some fun modeling the pieces for you myself. Over my modern clothes. I'm very silly today, I know. . . But if you don't laugh, you cry, right? Anyhow. . .

I call this one "Proud Mr. Darcy":


Regency gents know all about poppin' their collars! BWAH HA HA HA HA!!!!!


Um. . . I don't even know. Maybe I'm showing off my waistband? Or the fact that I didn't do any of the behind-the-scenes pieces on the pants so I'd be giving you a bit of a show if I weren't fully dressed in modern clothing underneath!


Right. Enough silliness. I'm going to see if I can get the patterns all traced and new mock-ups cut before it's time to bid farewell to this weekend!

Thursday, March 13, 2014

Regency Menswear!

So there is potentially a change in plans, because it seems possible that my husband may be dragged along accompanying me to the Regency Intensive Dance Weekend! That would mean that it would probably be wise of me to spend my sewing time between now and then crafting his ensemble as opposed to making nice-but-not-necessary enhancements to my own wardrobe!

I already have a shirt and top hat well under way, which is a good start. . . And, I already knew I would eventually put together an entire ensemble for him, which is also good since that means I have already hoarded a nice little collection of fabrics and patterns to start with!

I've been thinking a bit more about the details and time period to shoot for with this ensemble, and I'm calling it "1810s" for now. These two fashion plates (both from 1813) give a good idea of the feel I'm aiming for:


As you see, I'm definitely going the route of long pants. (I just think it's a bad plan to try to introduce my husband to the idea of historic costumes by way of breeches and stockings!) The fabric I have set aside for this is a caramel colored cotton. Probably not the most frequent fabric choice for pants of this era, but the color is good, as I've seen it in multiple paintings and at least one surviving pair of pants from this era.

As for the waistcoats, I have something ridiculous like five silk fabrics hoarded away with the intention of becoming waistcoats! Among these are a waffle-like pattern and a blue stripe that are similar to those in the plates (which is a good part of the reason I chose them to be representative of what I'm aiming for!) The great thing about waistcoats is that they don't take up a ton of fabric, and can completely alter the look of an ensemble that is otherwise using the same garments. My only problem is in choosing which fabric to use first!

So that just leaves the coat, and this one will be a bit of an under-taking, I'm sure! I've done some tailoring before, and even did a coat for Glenn before (though not vintage. . . Well, I guess "Cobra Commander" is a bit vintage, seeing as how he's a 1980s thing!) so I can draw on my experience from those projects. I'm not sure if I'm going to go with the Country Wives pattern or with one of the Laughing Moon patterns instead, or perhaps I'll be pulling bits and pieces from here and there amongst multiple books and patterns to get the right look. . . We'll see! I've got my heart set on having a blue coat, but the only blue wool fabrics I can find are either a totally wrong weave, or much darker a shade than I wanted. I do have one option in my stash, but I am not completely in love with it, so may yet do some shopping around. . .

Thursday, March 6, 2014

"I shall have to be bought new clothes, for I have nothing fit to wear, and there will be balls and parties every night!"

I've decided that this year, I shall attend the "Regency Intensive Dance Weekend" hosted by the Commonwealth Vintage Dancers. This era for fashion is one of my favorites, and it's also my favorite era of dance out of those I've yet tried. However, I don't really know much about Regency dance. . . So how perfect is it for me to attend a weekend where I get to learn and practice dancing all weekend, plus, get to dress up three times?!?

So of course, I'm assessing my wardrobe and deciding what I'd like to make for this event. Luckily, I have both a wearable ball gown and day dress, so technically, I have all that I need to survive the weekend. But where's the fun in just wearing the same old things without at least adding a little something new here and there, right? Here are my current wardrobe plans:

Ball #1: New dress! Will be extremely simple style, using the pattern I used for my dotted Swiss dress with slight variation, and of a metallic striped cotton. Easy-peasy!

Ball #2: The Wicked Puffy Dress again! Because I think this might be my favorite thing I've yet made, and I want to wear it as much as possible. So I'll get the rest of the trimmings on in time for this event!

Day Event: TBD. I have my dotted Swiss dress which, if nothing else, is a great back-up option. But I'm contemplating a "something new" for this part of the weekend. Just not sure if I want to invest my time in a new ensemble (maybe finish my two-piece dress?) or maybe make some fun new accessories instead. . . If I am smart, I will instead focus my efforts on a Pelisse, since it's likely to still be chilly at this time of year and I get cold very easily. So, I'll have to mull this over and see what I'm most in the mood to make! ;)

So, stay tuned for some Regency sewing adventures! :)

Wednesday, February 12, 2014

The Wicked Puffy Dress, aka, that time I hand-sewed a Regency ball gown in two weeks flat. . .

I really had no intention of attending the Commonwealth Vintage Dancers Regency ball in Salem. . . But then, only a few weeks before, I found out my good friend was flying up from Virginia and attending it! Of course I had to go! But somehow, there was no Regency evening wear in my wardrobe. Shocking! With only a few weeks to the event, and knowing I wouldn't be me if I didn't hand-sew the entire thing, I did the only logical thing: Took on a big, ridiculously, very trimmed project!!!

After two weeks of hand sewing like a maniac (in between full time work, part time school, and other miscellaneous things like not neglecting time with my husband, LOL!) I produced this:


I still have a few things to do to it. Mainly, I need to add the puffings to the skirt! Also, the undersleeve should have a drawstring and bit of lace, and the oversleeve wants some bonus trimmings as well. . . But I'm pleased to say that construction-wise, it was done. As in, no safety pins holding this baby together! Hooray for that!

This is a recreation of the 1822 "Brudekjole" (aka wedding dress, but also very appropriate as ball attire) from the Danish "Nationalmuseet." You can see the original on their web site, here.

Since they provide the pattern for this dress (YAY!) I used that. I scaled the pattern up by hand using a gridded board and ruler, and stayed pretty faithful to it as is, save for a few minor changes to make it fit my particular size/shape. I had some translating adventures to try to figure out all the construction details provided, but I think I understood it fairly well! Things that didn't seem to make sense to me at first became clear as I actually reached that point in the pattern. So, it all went very well indeed!


The gorgeous parure (aka jewelry set) I'm wearing is made by the talented Taylor (my friend who flew in for the ball!) and you can purchase such lovely jewelry from her at her Etsy shop here: Dames a la Mode

All in all, the evening was perfect! I didn't actually end up dancing, but greatly enjoyed spending time with my friends, both local (including the lovely Sarah, who took these pictures for me!) and long distance, as well as meeting new folks, and of course, playing dress-up. ;) And, I had a blast stepping up to the challenge of pulling this off in such a short amount of time. It was a win-win!

Wednesday, January 1, 2014

Holiday Tea 2013

We returned again to the gorgeous "Gore Place" for our 2013 Holiday Tea! It was not "Jane Austen" themed this year, but the setting still made it the perfect place for our Regency attire, and as always, the staff are amazing, and seemingly appreciative of our willingness to play dress-up. ;)


I convinced my husband to tag along this year! I had thought to maybe have the start of a period ensemble together for him, but I ended up with a partially sewn shirt and the starts of a hat. So, modern attire it had to be, but I still think he looked dashing!


Gore Place has a ridiculously beautiful piano that was a very generous gift to them, and we were allowed to sit and pose with it (though not to touch it as we'd just had sticky tea deserts and this is a seriously rare and stunning instrument!)


Glenn so patiently stood by while we took lots of pictures of each of us having our turn to pose with the piano!


And then, he even stepped in as photographer so we could have a group shot of all the costumed ladies!